

10 Tips for Choosing the Right Kitchen Backsplash?
Choosing the right kitchen backsplash involves more than matching a pretty tile to painted cabinets. A backsplash must handle cooking splashes, heat, cleaning products, and years of daily use. It also occupies a highly visible wall, often between the countertop and upper cabinets. Small choices become obvious there. Grout color, tile thickness, surface texture, and installation quality can change the entire room.
Kitchen designer Susan Serra, CKD, captures the backsplash’s visual importance with her well-known description: “The backsplash is the jewelry of the kitchen.” That idea is useful, but it can also mislead. Beauty cannot replace durability. A glossy marble tile may reflect light beautifully, yet it can stain near a busy cooktop. A heavily textured tile may add character, but grease can collect in its uneven surface. The best Back Splash decisions balance appearance with maintenance, budget, scale, and personal cooking habits.
This guide presents 10 practical tips for choosing a backsplash with greater confidence. It considers material performance, color relationships, grout maintenance, wall dimensions, lighting, and installation details. Some kitchens need a quiet ceramic field tile. Others benefit from a bold pattern behind the range. There is no perfect choice. That is worth admitting. Even experienced designers can underestimate how quickly a trend feels dated, or how demanding pale grout becomes. Careful planning helps reduce those surprises and creates a Back Splash that looks intentional, works reliably, and still feels comfortable after thousands of meals.
Define Your Kitchen’s Backsplash Needs and Priorities
Before choosing a kitchen backsplash, define what your space must handle. Watch your routine for a week. Do you fry often, knead dough, or rinse vegetables beside the wall? Oil, steam, and splashes create different cleaning demands. A smooth, nonporous surface usually suits heavy cooking better than deeply textured material. If your kitchen is mainly decorative, appearance may deserve more weight. Still, daily maintenance should not become a chore.
Measure the wall behind the cooktop and sink, including corners, outlets, and exposed cabinet edges. A backsplash needs enough height to protect vulnerable areas, not merely fill a predetermined rectangle. Check lighting at morning and evening. Glossy surfaces can brighten a dim room, but strong reflections may reveal grease marks. Matte finishes hide some smudges, although textured grooves can collect residue. I once favored a beautiful uneven tile without testing its cleaning needs. That choice looked thoughtful, yet wiping it was frustrating.
Set priorities in writing: easy cleaning, heat resistance, water protection, visual character, installation time, and budget. Give each priority a score from one to five. This exposes compromises. A low-cost option may require more grout care or frequent sealing. Ask a qualified installer about substrate condition, moisture exposure, grout width, and safe clearance near cooking equipment. Request a small sample beside your countertop, cabinets, and work lights. Do not trust showroom lighting alone. Your priorities may change after one messy weekend.

Measure the Wall Area and Plan Tile Placement
10 Tips for Choosing the Right Kitchen Backsplash?
Measure the wall area before choosing tile. Record each section separately, including the space behind the range and beneath cabinets. Measure width and height in inches, then multiply them for square footage.
Subtract large openings, but keep small obstacles in your calculation. Walls are rarely perfect.
The 2024 U.S. Houzz Kitchen Trends Study found that backsplash upgrades appear in roughly two-thirds of kitchen renovations. That visibility makes accurate planning essential.
Sketch the wall on graph paper, and mark outlets, corners, windows, and cabinet edges.
Use the actual tile dimensions, not the package label alone. Grout joints change the final layout.
A half-tile beside a cabinet can look accidental.
Tile Council of North America installation guidance commonly allows about 10% extra material for cuts, breakage, and future repairs. Add more for diagonal patterns, complex borders, or many outlets.
Dry-lay several rows on the floor first. Center the pattern on the most visible wall, then balance the cut pieces at both ends.
I once centered a design around the room instead of the range. The result looked technically correct, but visually awkward.
Measure again. Then question the first plan.
Compare Backsplash Materials for Durability and Maintenance
10 Tips for Choosing the Right Kitchen Backsplash?
Compare Backsplash Materials for Durability and Maintenance
Start with your cooking habits, not only the color chart. Porcelain tile is a strong option for busy kitchens because ANSI A137.1 defines it as having 0.5% water absorption or less, according to the 2024 Tile Council of North America Handbook. Compare glazed ceramic, glass, porcelain, and natural stone samples. Glazed ceramic usually cleans easily, but chipped edges can expose the body. Glass resists stains, although fingerprints and grease show quickly. Porcelain handles heat and moisture well. Check the surface texture before buying.
Natural stone offers depth, but it demands more care. The Natural Stone Institute’s Dimension Stone Design Manual warns that acidic cleaners can etch marble and limestone. Use a neutral cleaner, and ask whether the stone needs sealing. Sealing helps, but it does not make stone stain-proof. Choose smaller grout joints carefully. More joints mean more cleaning. Epoxy grout resists stains better than cement grout, but installation mistakes can remain visible. That part is often underestimated.
Hold a sample behind your cooktop. Test it beside your cabinets. Inspect uneven edges, outlet cuts, and corner transitions. Ask the installer about heat-rated adhesives and movement joints. Wipe a sample with oil, tomato sauce, and a mild cleaner. Wait overnight. Some glossy finishes look perfect in a showroom, then reveal every splash under bright lighting. I would not choose a material without this test. Kitchens are rarely as tidy as sample boards.
Choose Colors, Patterns, and Textures That Suit the Kitchen
10 Tips for Choosing the Right Kitchen Backsplash
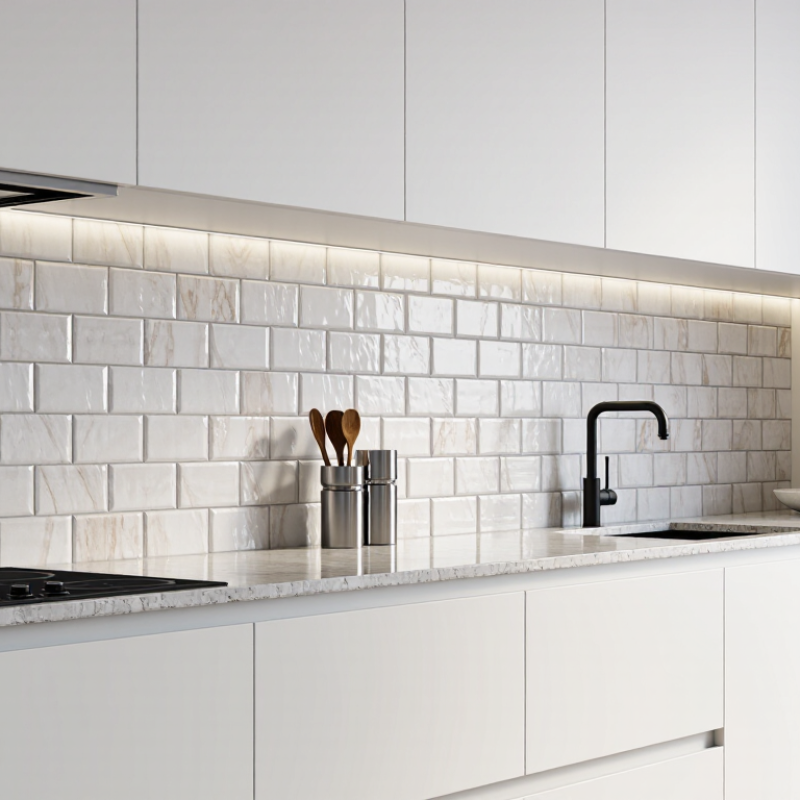
Color, pattern, and texture should support the kitchen’s daily rhythm. In my projects, I test samples beside cabinets, worktops, and appliances at morning and evening light. A soft white backsplash can brighten a narrow room, while clay, sage, or muted blue adds warmth without overwhelming it. Strong contrast works well behind pale cabinets, but it may expose grease and water marks more clearly.
Pattern needs restraint. Small kitchens often benefit from quiet vertical layouts, which can make walls feel taller. Large-format tiles create fewer grout lines and a cleaner appearance.
The Houzz 2024 U.S. Kitchen Trends Study reports a median spend of $55,000 for major kitchen renovations. That figure makes durable, adaptable choices especially important. Expensive mistakes remain visible for years.
Texture adds depth, but it also adds maintenance. Handmade-look surfaces provide subtle variation, although uneven edges can collect crumbs. Glossy finishes reflect light and wipe clean easily; matte finishes feel calmer but may show oil.
The National Kitchen & Bath Association’s 2024 Kitchen Trends Report highlights natural-looking materials and warmer palettes as current directions. Trends change quickly.
I once selected a dramatic mosaic that looked excellent in a showroom, yet felt busy in a small home. A quieter tile would have served better.
Check grout color carefully. It can alter the entire pattern.
Review Installation Methods, Costs, and Long-Term Care
Choosing the right kitchen backsplash requires more than matching cabinet colors. Measure the wall twice, including outlets, corners, and the space behind the range.
Tip one: order 10% extra tile for cuts and future repairs.
Tip two: compare ceramic, porcelain, glass, and natural stone by water absorption. Porcelain usually tolerates heat and moisture better than porous stone.
Tip three: inspect sample tiles under your actual kitchen lighting.
Installation affects both cost and durability.
Tip four: use a qualified installer for uneven walls or large-format panels.
Tip five: confirm the substrate is clean, flat, dry, and properly primed.
The Tile Council of North America’s Handbook stresses correct substrate preparation and movement accommodation. Ignoring either detail can cause cracks.
Tip six: choose grout width and color carefully. Dark grout hides cooking stains but may show mineral deposits.
Tip seven: request a written estimate covering demolition, adhesive, trim, outlets, sealing, and disposal.
My early estimates were too optimistic. Small extras accumulate quickly.
The National Association of Realtors’ 2024 Remodeling Impact Report estimated 96% cost recovery for a minor kitchen upgrade, compared with 49% for a major renovation. That does not make every expensive backsplash sensible.
Tip eight: set a per-square-foot budget before shopping.
Tip nine: seal porous materials according to the installer’s schedule, not personal guesswork.
Tip ten: wipe oil and tomato splashes quickly with a pH-neutral cleaner.
Avoid abrasive pads. Check grout annually for gaps, discoloration, or soft spots. A beautiful surface still needs maintenance.