
How to Choose LVP Tile for Your Project?

Choosing the right Lvp Tile can shape a room’s comfort, durability, and long-term maintenance. A busy kitchen needs different performance from a quiet bedroom or retail corridor. The best choice begins with the project, not the product photograph.

During flooring evaluations, installers usually inspect subfloor moisture, surface flatness, sunlight exposure, and expected foot traffic. These details affect plank stability and appearance. A thicker wear layer may protect against scratches, while a rigid core can help manage minor subfloor movement. However, no Lvp Tile solves serious moisture or leveling problems beneath it.

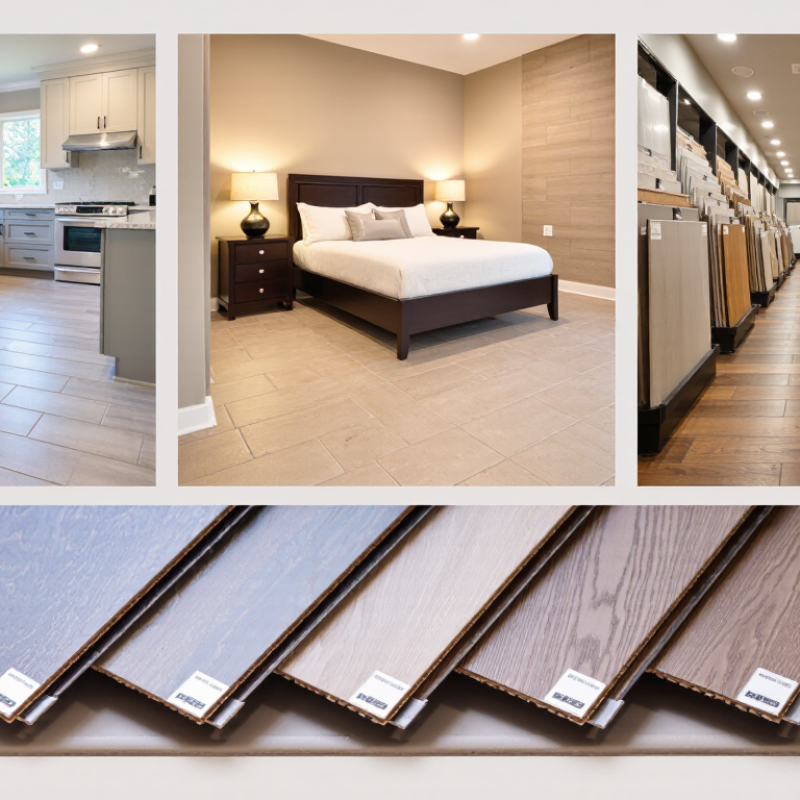
Look closely at texture, locking systems, warranty terms, and installation requirements. Hold samples beside cabinets and under both daylight and warm indoor lighting. Small differences matter. A gray tone may appear blue near a window, while embossed grain can collect dirt in high-use areas. Product claims should be checked against technical documents, not only showroom language.

Budget also deserves a realistic review. Lower purchase prices can increase preparation, waste, or replacement costs later. I have seen attractive floors disappoint when expansion gaps were ignored or cleaning products were chosen carelessly. That mistake is easy to repeat. Careful planning remains more valuable than a dramatic sample.

This guide explains how to compare Lvp Tile by construction, wear resistance, visual design, installation method, and maintenance needs. It also considers room conditions and practical installation limits. The goal is not to identify one universal winner. It is to select flooring that performs reliably in its actual environment.
How to Choose LVP Tile for Your Project?

Define the Key Features and Types of LVP Tile

Choosing LVP tile starts with identifying the project’s traffic, moisture, and installation conditions. Luxury vinyl is built in layers: a protective wear layer, printed visual film, resilient core, and backing. The wear layer controls surface resistance, while the core affects denting, comfort, and stability. Look for documented thickness and testing, not vague claims.

LVP usually imitates wood planks. LVT uses square or rectangular tile formats that resemble stone or ceramic. Both may use rigid or flexible cores. Rigid-core products can hide minor subfloor unevenness, but they cannot correct serious moisture or structural problems. Flexible formats often feel softer underfoot. They demand a flatter subfloor.

Data helps explain the category’s growth. Grand View Research estimated the global luxury vinyl tiles market at about $25.36 billion in 2022, with projected growth of 7.7% annually from 2023 to 2030. That expansion brings more specifications, and more confusion. A thicker product is not automatically better. Check the wear layer, locking system, dimensional stability, slip performance, and warranty conditions. ASTM testing can provide useful comparability, although test results may not mirror a busy hallway, rolling chair, or sandy entryway. I would also request a sample and leave it near a window for several days. Color shifts are easy to underestimate. Some installation decisions remain imperfect. The subfloor still matters most.

Match Tile Specifications to Room Conditions

How to Choose LVP Tile for Your Project?

Match tile specifications to the room, not just its appearance. In bathrooms, laundry areas, and basements, check the subfloor moisture before choosing LVP. ASTM F2170 measures concrete relative humidity in situ. Its results help installers compare moisture levels with the flooring manufacturer’s permitted range. Never assume “waterproof” means moisture-proof underneath.

Indoor conditions matter too. ASHRAE Handbook—Fundamentals recommends indoor relative humidity commonly between 30% and 60% for comfort and building performance. Wide humidity changes can affect expansion gaps, adhesive performance, and plank movement. In a sunny kitchen, select products with documented dimensional stability and suitable UV resistance. Dark rooms may need less visual fading protection, but that assumption can age badly.

Wear layer thickness should match traffic. A 12-mil layer may suit a quiet bedroom, while busy hallways often justify 20 mil or more. The Resilient Floor Covering Institute recommends following ASTM installation practices and using manufacturer-specific subfloor tolerances. Check flatness with a straightedge; small ridges can become visible under thin tile. I once underestimated furniture legs. Felt pads helped, but they did not fix poor floor preparation. Building codes, moisture readings, temperature, and daily use should guide the specification. Fancy texture cannot compensate for the wrong construction.

How to Choose LVP Tile for Your Project?

Match tile specifications to room conditions by considering traffic level, moisture exposure, and required durability.

Reference ranges: residential LVP commonly uses 6–12 mil wear layers, while high-traffic or commercial applications often use approximately 20 mil. Product thicknesses commonly range from about 2–8 mm. Bathrooms and laundry rooms also require moisture-resistant installation practices and a suitable waterproof product system.

Compare Wear Layers, Textures, Colors, and Patterns

How to Choose LVP Tile for Your Project?

Wear layers protect LVP from scuffs, stains, and daily traffic. For bedrooms, a moderate wear layer may be sufficient. Busy hallways and kitchens need stronger protection. Check the thickness in mils, but do not judge durability by thickness alone. The wear layer’s finish also matters. A matte surface often hides small scratches better than a high-gloss coating. I recommend comparing samples under natural and artificial light. Showroom lighting can be misleading.

Texture affects both appearance and safety. Embossed wood textures can make planks feel more realistic beneath bare feet. However, deep grooves may collect dust and require careful cleaning. Smooth tiles are easier to maintain, but they can look less convincing. Consider the room’s moisture and cleaning habits. A lightly textured surface is often a practical compromise. It is not always the most dramatic choice.

Color changes how large and bright a room feels. Pale oak tones can open a narrow space, while charcoal shades add visual weight. Warm colors suit traditional interiors, but cool gray may support modern furniture. Patterns need equal care. Random plank layouts look natural, while repeated patterns may appear artificial. Lay several samples together before deciding. I once underestimated repetition in a small room, and the finished floor looked busier than expected. That mistake is worth remembering.

Evaluate Installation Methods and Subfloor Requirements

How to Choose LVP Tile for Your Project?

Evaluate Installation Methods and Subfloor Requirements

The installation method should match the room, subfloor, and your maintenance expectations. Click-lock LVP tiles create a floating floor without adhesive. They install quickly and work well over stable, level surfaces. However, the floor may sound hollow if the subfloor is uneven. Expansion gaps around walls and fixed objects are essential.

Glue-down tiles bond directly to the prepared subfloor. This method feels firm underfoot and suits rooms with rolling loads, such as offices or laundry areas. It requires careful adhesive coverage and pressure during installation. Loose-lay products can simplify replacement, but they need a smooth, clean surface. Dust can reduce traction. I have learned that speed often creates extra work later.

Subfloor preparation decides the final appearance. Concrete should be dry, solid, and tested for moisture before installation. Wood panels must be securely fastened, with damaged sections replaced. Fill cracks, sand high spots, and remove oil, wax, and loose paint. Existing tile may remain if its surface is sound and grout lines are properly leveled. Do not hide major problems beneath new flooring.

Let the tiles acclimate according to the installation instructions. Room temperature matters. Measure from several points, because walls are rarely straight. A small uneven area can become visible near a doorway. I once underestimated that detail. The repair was avoidable. Always follow the product’s technical requirements, since adhesive, gap, and moisture limits can differ.

How to Choose LVP Tile for Your Project? — Evaluate Installation Methods and Subfloor Requirements
Installation Method Best-Fit Project Conditions Subfloor Requirements Moisture Considerations Movement and Expansion Installation Complexity Key Advantages Important Limitations
Click-Lock Floating Residential rooms, bedrooms, living areas, and other spaces where a fast, adhesive-free installation is preferred. Must be clean, dry, structurally sound, and flat. A common industry tolerance is approximately 3/16 inch over 10 feet, although the product instructions control. Concrete moisture testing is recommended before installation. Use only an approved vapor barrier or underlayment when required by the flooring system. Perimeter expansion gaps are typically required, often around 1/4 inch, but the exact gap depends on the product and room conditions. Moderate Quick installation, limited mess, and easier plank or tile replacement. Can sound hollow if the subfloor is uneven. Large or complex areas may require transition profiles or additional movement planning.
Full-Spread Glue-Down High-traffic areas, commercial spaces, rooms with heavy rolling loads, and installations requiring strong dimensional stability. Requires a very smooth, flat, clean, porous or properly prepared surface. Cracks, ridges, contaminants, and residual adhesive may need repair or removal. Moisture limits vary by adhesive and flooring system. Concrete should be tested using an accepted in-situ relative-humidity method, and results must meet the adhesive manufacturer’s limit. Usually has less visible movement than a floating floor, but the assembly still needs movement joints where required by the design and product instructions. High Firm feel underfoot, strong resistance to shifting, and good suitability for rolling traffic. More labor-intensive, harder to remove, and sensitive to adhesive selection, spread rate, open time, and subfloor preparation.
Loose-Lay Temporary installations, retail areas, light commercial spaces, and rooms where future removal or repositioning may be useful. Must be exceptionally smooth, flat, dry, dust-free, and free from loose particles because the flooring relies on friction and dimensional stability. Concrete moisture and alkalinity still need evaluation. A loose-lay installation does not automatically eliminate moisture-related risks. Perimeter restraint, seam treatment, or limited adhesive may be needed in larger rooms, sun-exposed areas, or locations with heavy traffic. Low to Moderate Fast installation and relatively easy removal with little or no full-surface adhesive. May move, curl, or show telegraphing if the subfloor is uneven or the room exceeds the product’s installation limits.
Pressure-Sensitive Adhesive Projects needing a balance between secure placement and future serviceability, including some offices, retail areas, and renovations. Requires a smooth, sound, clean, and properly primed surface. Porous surfaces may need a compatible primer or skim coat. Moisture limits depend on the adhesive. Concrete should be tested before installation, and excessive moisture should be corrected rather than concealed. Generally provides controlled movement, but room perimeter and seam requirements remain dependent on the flooring system. Moderate Good positioning flexibility during installation and easier removal than many permanent adhesives. Insufficient open time, contamination, low temperature, or poor adhesive transfer can cause bond failure.
Peel-and-Stick Small, low-complexity residential areas where the existing floor is suitable and a simple installation method is desired. Needs a hard, smooth, clean, dry, and firmly bonded surface. Texture, grout lines, dust, wax, and surface irregularities can telegraph through the tile. Subfloor moisture must remain within the flooring and adhesive limits. It is not a substitute for moisture mitigation or a waterproofing system. Tiles should be installed with tight, accurately aligned joints. Perimeter detailing depends on the product and room layout. Low Minimal tools, no wet adhesive, and a straightforward installation process. Limited tolerance for uneven or contaminated subfloors; bond strength can be reduced by cold temperatures or inadequate pressure during installation.
Direct Installation Over Concrete Basements, slabs-on-grade, and upper-level concrete decks that are structurally sound and properly prepared. Concrete must be cured, flat, smooth, clean, and free of laitance, curing compounds, oil, paint, and loose material. Cracks and low areas should be treated with compatible repair products. Concrete can transmit vapor. Use documented moisture and alkalinity test results, then select a flooring system and adhesive rated for the measured conditions. Floating systems normally require perimeter gaps; adhered systems follow the movement-joint and installation requirements of the flooring assembly. Moderate to High Provides a stable base when moisture and surface preparation are properly managed. Unresolved slab moisture, hydrostatic pressure, or surface contamination can cause installation failure.
Installation Over Wood Subfloor Wood-framed houses, upper floors, remodels, and projects where removing the existing wood structure is impractical. Panels must be structurally sound, securely fastened, clean, and flat. High spots should be sanded and low areas repaired with a compatible leveling or underlayment system. Wood moisture content should be evaluated with a suitable meter. Avoid installation when the subfloor has active leaks, swelling, rot, or excessive moisture variation. Follow the LVP system’s requirements for perimeter clearance, underlayment, and movement joints. Do not bridge unstable joints or damaged panels. Moderate Can reduce demolition work and preserve an otherwise serviceable structure. Deflection, squeaks, uneven panels, and moisture imbalance can telegraph through the finished floor or affect locking joints.
Installation Over Existing Hard Flooring Renovations where ceramic tile, sheet flooring, or firmly bonded resilient flooring is being retained. Existing flooring must be fully bonded, stable, clean, and sufficiently flat. Deep grout lines, embossed patterns, loose tiles, and damaged areas generally require patching or removal. Moisture testing may still be necessary, especially over concrete or below-grade rooms. Existing flooring should not be used to hide moisture damage. Existing movement joints and perimeter conditions must be assessed so they do not create ridges or stress points beneath the LVP. Moderate Less demolition, reduced waste, and potentially shorter project duration. Subfloor height increases can affect doors, appliances, transitions, and stair nosings.
Planning note: Actual flatness tolerances, moisture limits, acclimation time, underlayment approval, expansion gaps, adhesive selection, and warranty conditions vary by flooring system. Always confirm the latest installation instructions, test the subfloor before installation, and correct structural, moisture, or leveling problems before laying LVP.

Check Quality, Maintenance Needs, and Project Budget

How to Choose LVP Tile for Your Project?

Quality should be judged beyond appearance. Hold a sample near a window and inspect its surface texture, edge finish, and color consistency. A thicker wear layer generally offers better resistance to daily traffic, pets, and rolling chairs. Check the product specifications, not only the showroom display. The backing and core also matter because uneven floors can expose weaknesses over time. I once underestimated subfloor preparation, and the finished floor showed minor movement. That mistake was avoidable.

Maintenance needs should match the room’s real conditions. For kitchens and entryways, choose a surface that handles spills and frequent cleaning without demanding special treatments. Sweep grit regularly, wipe moisture promptly, and use manufacturer-approved cleaners. Avoid abrasive pads, even when stains seem stubborn. Think about furniture pads, sunlight, and muddy shoes. Small habits protect the finish.

Tips: Request several samples and compare them under daylight and warm lighting. Calculate more than the tile price. Include adhesive, underlayment, tools, delivery, waste, and professional installation. Keep extra pieces for future repairs, although storing them takes space. A lower initial budget can become expensive when repairs or replacement arrive early. Leave room for mistakes.

Scroll to Top